A bathroom remodel can be an exciting and rewarding project, but it can also be a bit overwhelming if you're not sure what to expect. It's always a good investment to update or remodel a bathroom, even add one in your home. You can do a full remodel, or just redesign and update yours by changing some things like paint, the vanity and faucets or light fixtures without changing the location of things or opening walls.
It's important to note that bathroom remodels can vary in complexity and scope. Always work with a designer, with experienced contractors and professionals, and be prepared for unexpected issues that may arise during the remodel. A well-planned and well-executed bathroom remodel can add value to your home and improve your daily life.
Here's a general overview of what you can expect during a bathroom remodel. At Soledad Alzaga Interior Design we have worked in many bathroom remodels and upgrades and know that some clients don't know what to expect. They look at pictures of finished bathrooms and have an idea of what they want theirs to look like, but might not know all the different steps needed to achieve them. So I will do a full breakdown of the different steps.
1- Planning and Design
Determine your budget: Decide how much you're willing to spend on your bathroom remodel. This will influence the scope of the project and materials we will choose.
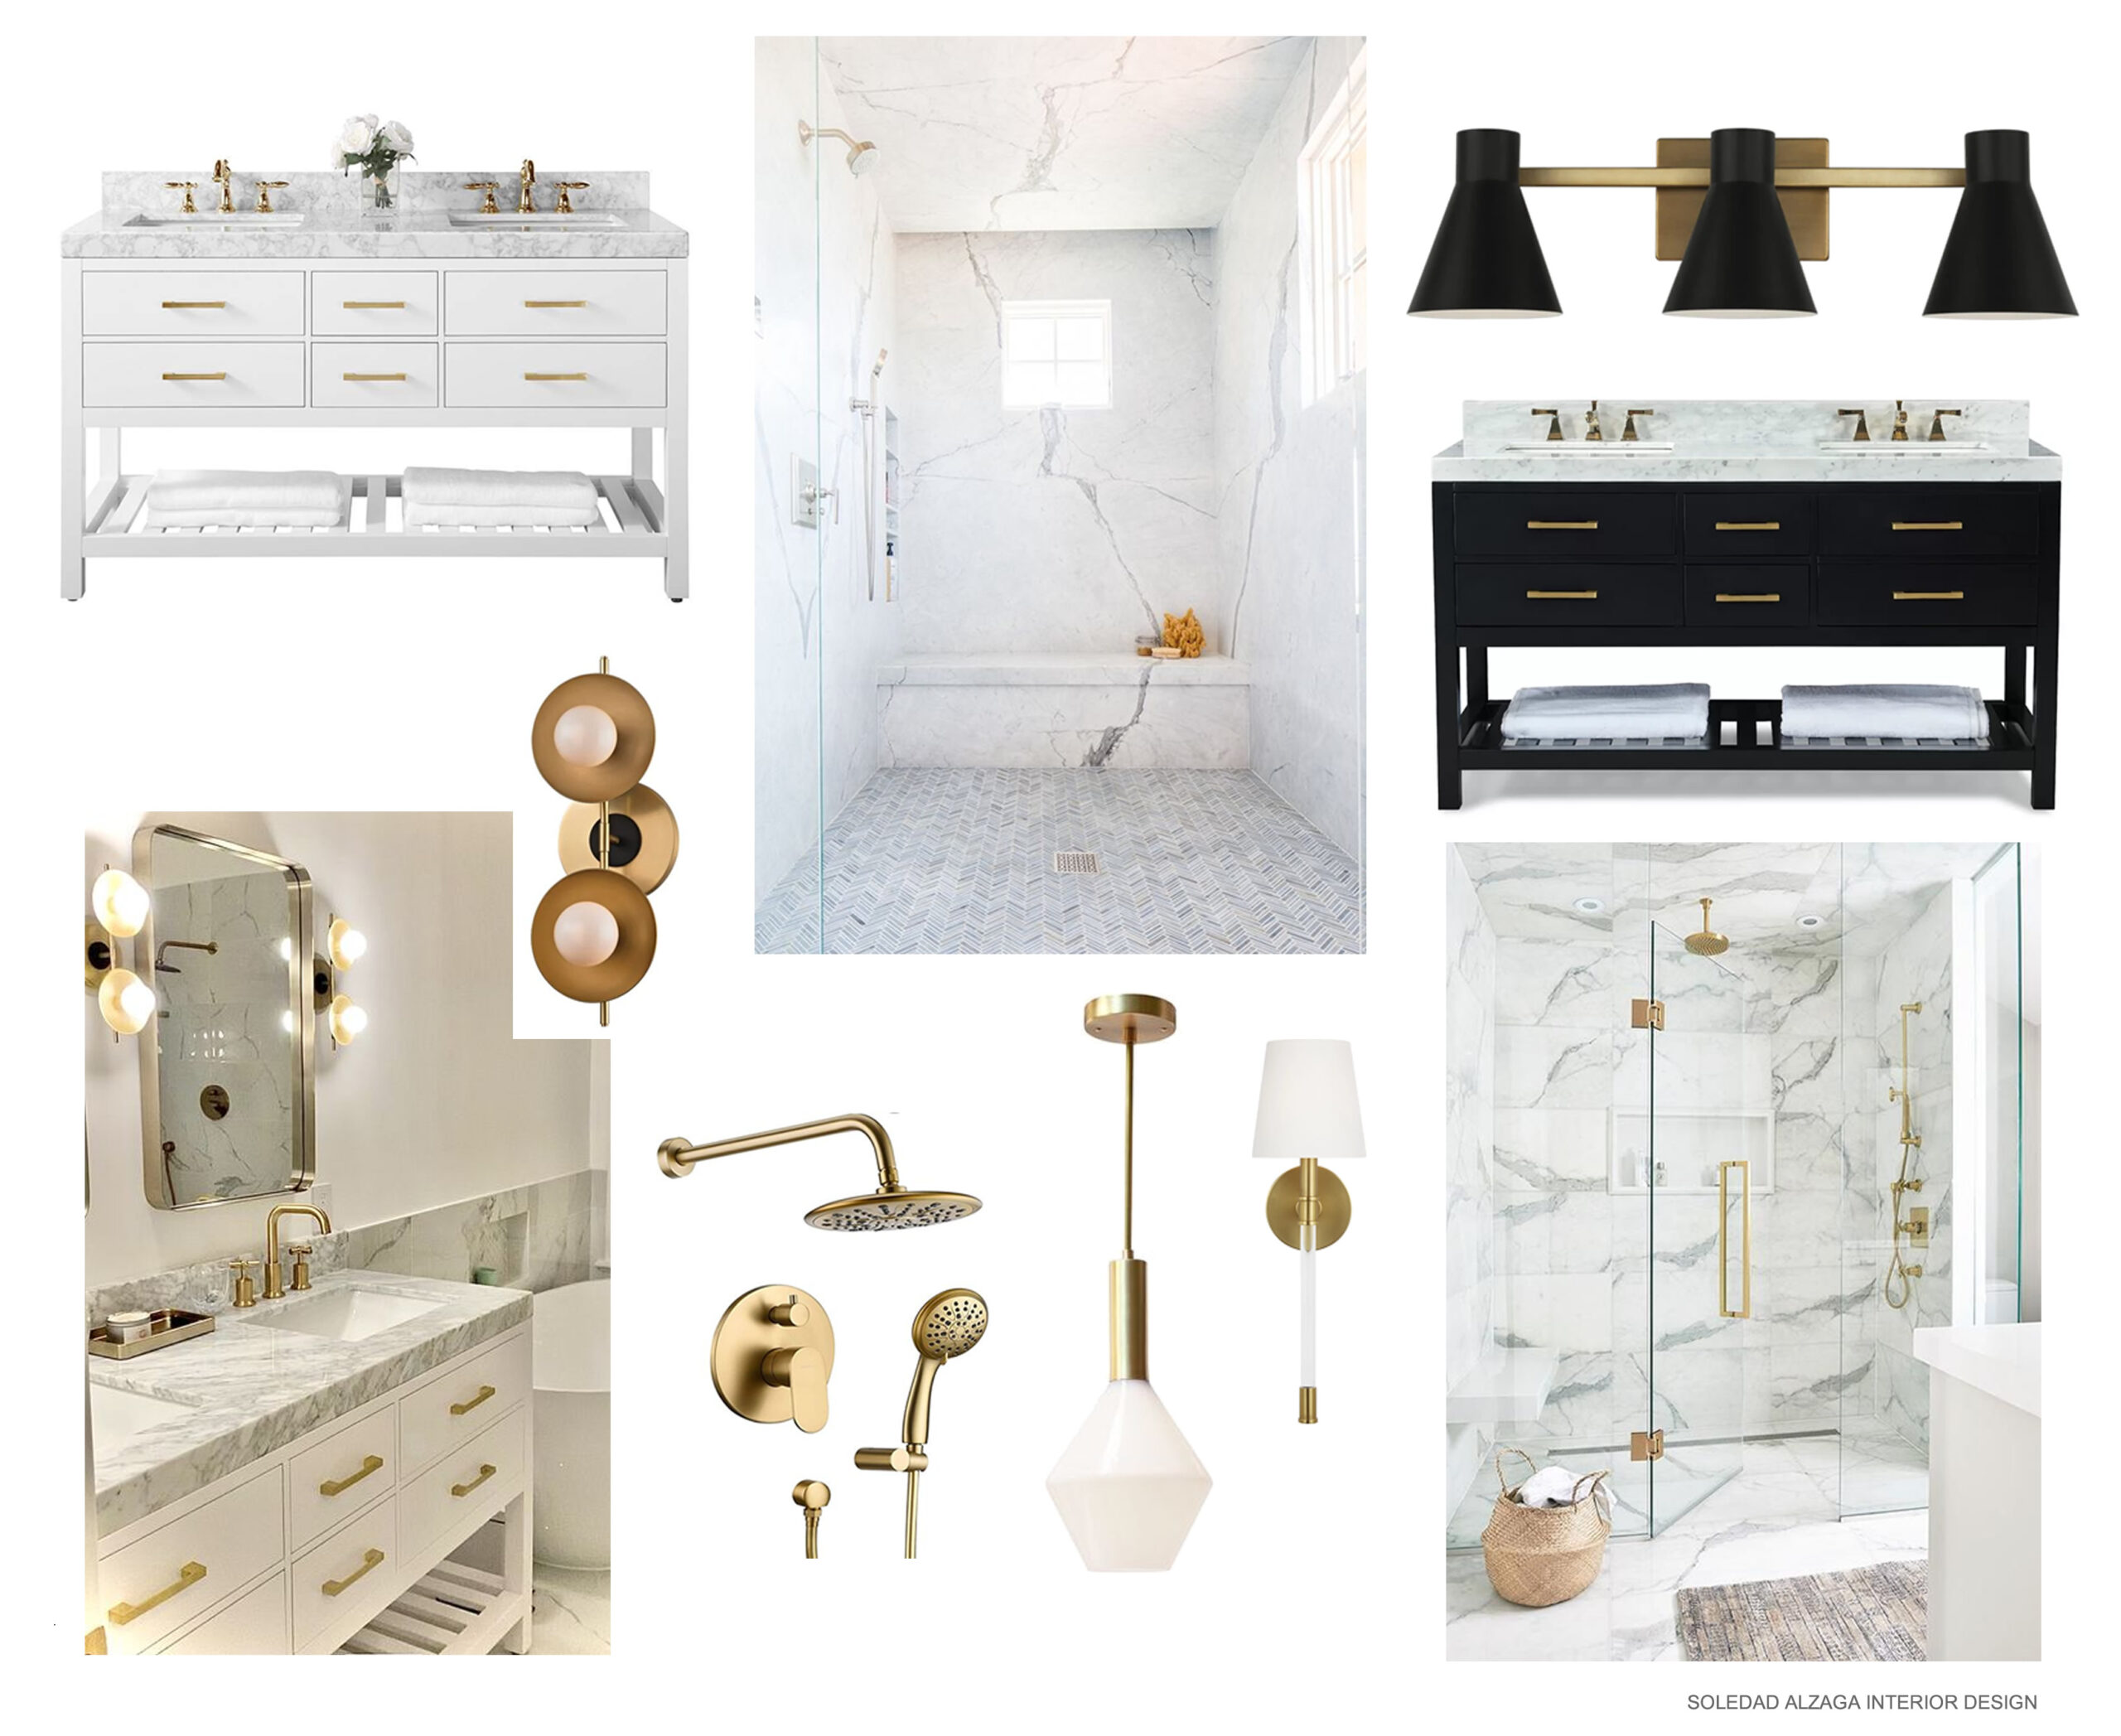
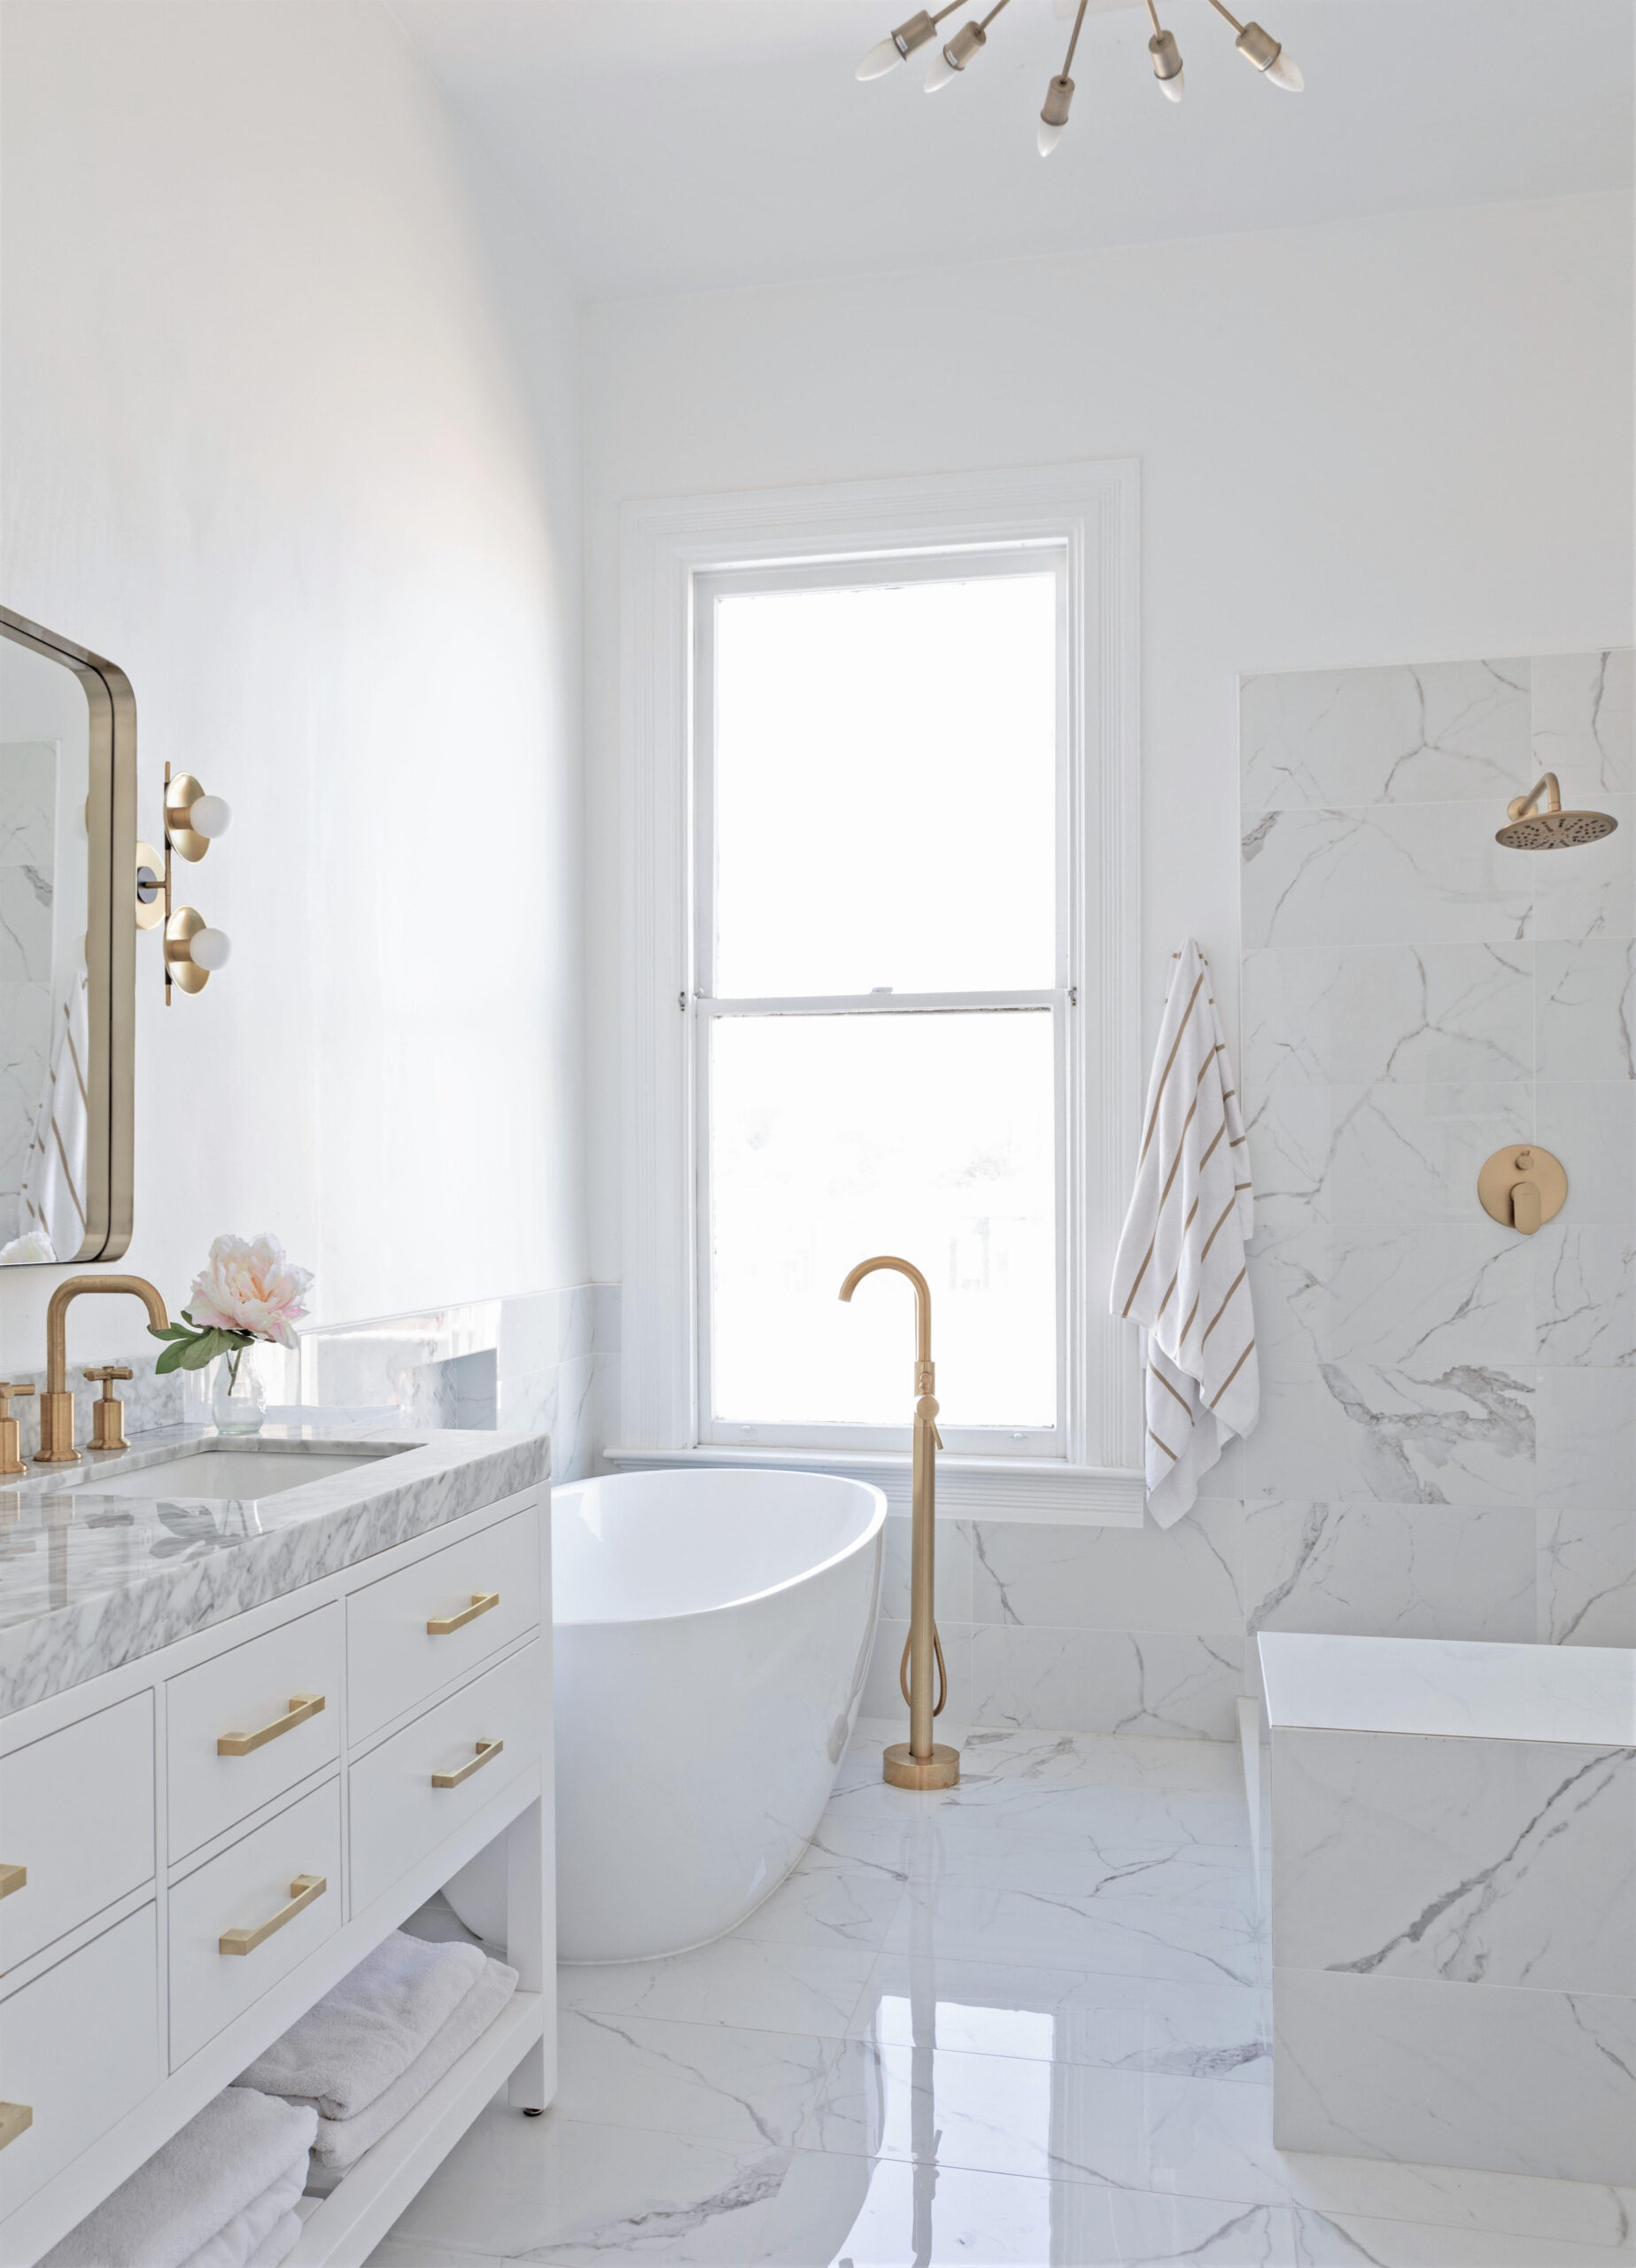
Create a design: Work with a designer to plan the layout, choose fixtures, tiles, colors, and overall style.
Get a good contractor: your designer can help you with this, or ask friends or interview and ask references of contractors who work in your area and are familiar with your city codes.
Obtain permits: Your contractor can do this, or as a home owner you can get them yourself. Depending on your local regulations, you will need permits for certain aspects of the remodel, such as plumbing and electrical work.
Once you have things designed, a contractor chosen and your permits, we always like to order everything keeping in mind the timeline of things and make sure it all fits within the schedule with the contractor. We try to have most of the material on site, or at least know they are arriving in time for when we need them installed. Nobody wants to have to stop mid project because you are waiting for tile to arrive. It messes with the contractor and sub-contractors schedule and it can be costly in time and money.
2- Demolition
First part of the project starts with the demo, but before starting you should make sure the rest of your house is protected. If you are doing the full house then there is no need to protect things from getting dusty or damaged, but if you are only updating a bathroom, then the rest of the surfaces, floors, lights, etc should be protected from getting damaged and dusty. And trust me you don't want to spend hours removing construction dust from a chandelier!
What is demolition? It's when the contractor tears out existing fixtures, tiles, and flooring to make way for the new design. In these phase we address any structural issues, plumbing or electrical problems that may be behind the walls.
3-Plumbing and Electrical
If you have an old house or condo things will have to be brought up to code. We will have to update or relocate plumbing and electrical systems as needed to accommodate the new layout, meet updated codes, etc.
This will include installing new pipes, wiring, and fixtures, such as sinks, toilets, showers, and lighting.
Ensure proper ventilation with a fan to prevent moisture buildup. Nowadays fans are required by code, and that is something that will be done in this phase and later finished when they instal lights.
4-Framing and Drywall
Make any necessary changes to the room's framing to accommodate the new layout. Install new drywall or repair existing walls and ceilings.
5-Flooring
Lay the new flooring material, such as tile, vinyl, or hardwood, according to your design plan. If you want a heated floor, we plan that ahead of time because it requires a separate electrical line and a thermostat. In my experience, this choice doesn't add a lot to the cost of the remodel but makes a huge difference to your comfort.
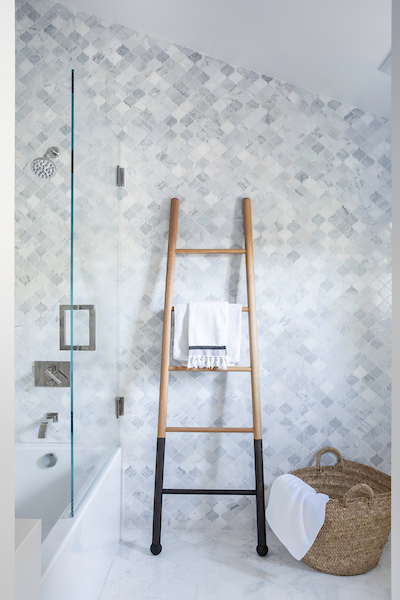
6-Tiling and Wall Finishes
Install the chosen tiles for walls and shower/tub surrounds. Make sure if you are using natural stone, to have the tiler seal it after they are done installing it. Your designer will help choose the grout color and texture that best work with your tile.
Finish walls with paint or other wall coverings.
7-Cabinetry and Fixtures
Install bathroom cabinets, countertops, sinks, faucets, and other fixtures.
Hang mirrors, towel bars, and other accessories.
8-Lighting and Ventilation
Install lighting fixtures, including overhead lights, vanity lights, and any other decorative lighting. the vent cover and finishes are installed in this phase too.
9-Final Touches
Install shower doors or curtains. Install window coverings if needed.
Test all fixtures and systems to ensure they are working correctly.
Clean the entire bathroom thoroughly.
Through out the project there will be inspections done by the city to make sure everything is incompliance with local building codes. The contractor handles that part and schedules inspections, with one last and final inspection where they sign off.
10-Final Walkthrough
Review the completed project with your contractor or designer to make sure all your expectations have been met.
It's common for unexpected issues or delays to arise, so it's a good idea to be prepared for some flexibility in your project timeline and budget. Working with experienced professionals can help ensure a smoother remodeling process.
Soledad Alzaga Interior Design was named top 15 Best Interior Design companies in San Francisco.
San Francisco, California
info@soledadalzaga.com
415-205-4680
